Building a continuous-integration Android build server on FreeBSD: Part three: configuring Jenkins for on-demand builds
November 2016.


In this series of blog posts, we're going to create a Android build server for continuous integration on FreeBSD.
- Part one will explain how to build Android APKs using Gradle on FreeBSD using the Linux emulation.
- Part two will explain how to configure Gitlab-CI to be able to run builds automatically for each commit.
- Part three (this post) will explain how to configure Jenkins to be able to run builds and email the APKs to people.
Requirements
We want people from our project to be able to build APKs of a Android app and get them by email once they're built. People should be able to configure their app with some Jenkins parameters.
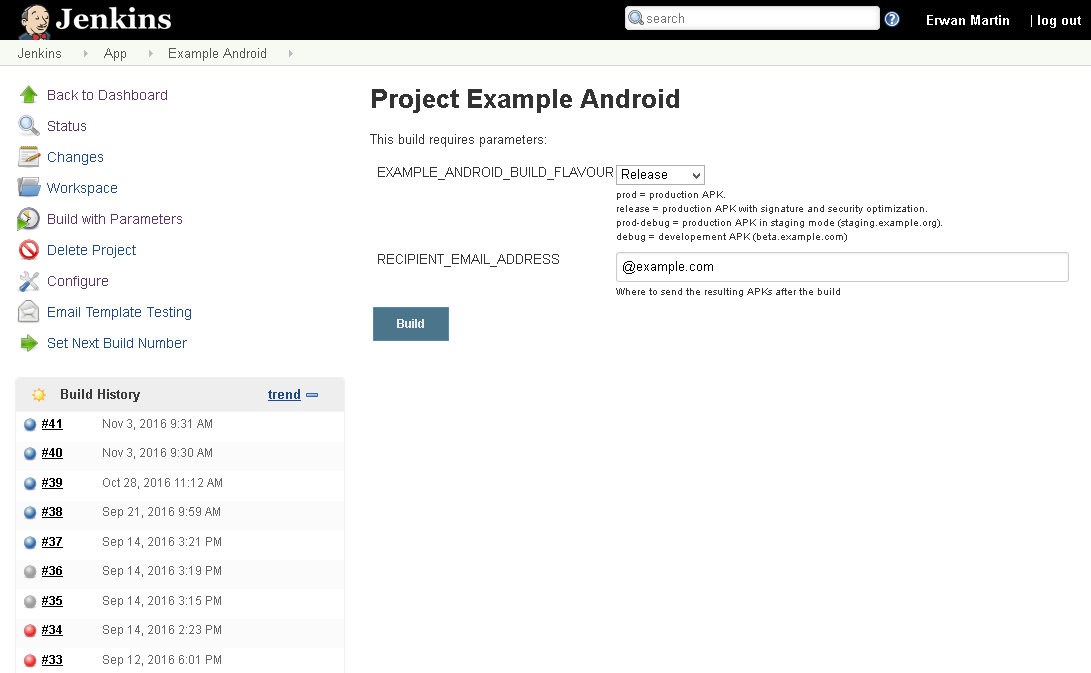
This post does not explain the basics of Jenkins. You should read the documentation if it's your first time using it.
You will need the following plugins:
Creating the node
In this scenario, I'm going to assume our FreeBSD build server is not on the same host as the Jenkins.
In consequence, we need to link the two systems by installing a Jenkins slave-node on the build system.
Preparing the server
On your Android build system, create a new user:
# pw group add -n jenkins-slave
# pw user add -n jenkins-slave -g jenkins-slave
Create a SSH key pair:
# ssh-keygen -t rsa
Generating public/private rsa key pair.
Enter file in which to save the key (/home/jenkins-slave/.ssh/id_rsa): jenkins-slave-id_rsa
Enter passphrase (empty for no passphrase):
Enter same passphrase again:
Your identification has been saved in jenkins-slave-id_rsa.
Your public key has been saved in jenkins-slave-id_rsa.pub.
Add the public key to your SSH's
authorized_keys. That will be how Jenkins connect to the slave.
# mkdir ~/.ssh/
# cat jenkins-slave-id_rsa.pub >> ~/.ssh/authorized_keys
Create the node on Jenkins
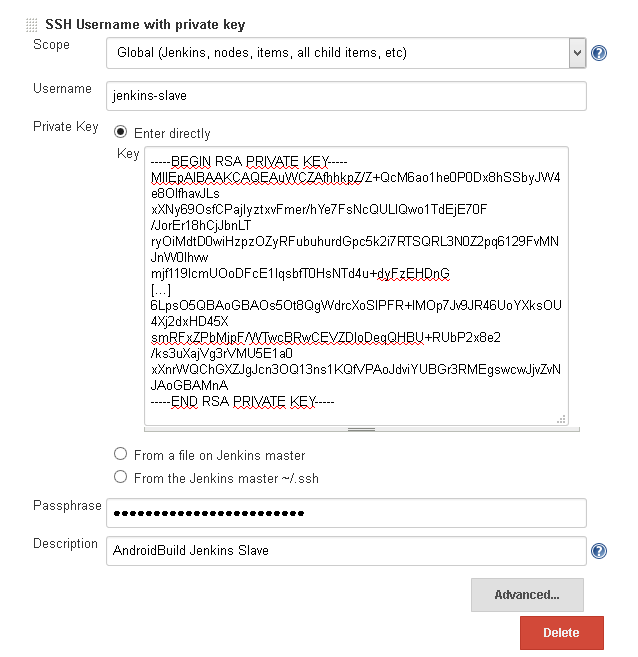
Go to "Manage Jenkins" -> "Manage credentials", and add a new "SSH Username with private key".
Put the private key you generated earlier there and configure the rest.
Go to "Manage Jenkins" -> "Manage Nodes" and create a new node.
Configure the node with the right host, port and home directory. Set the location of the java executable, or Jenkins will only try to find it in
/bin or /usr/bin and it won't work.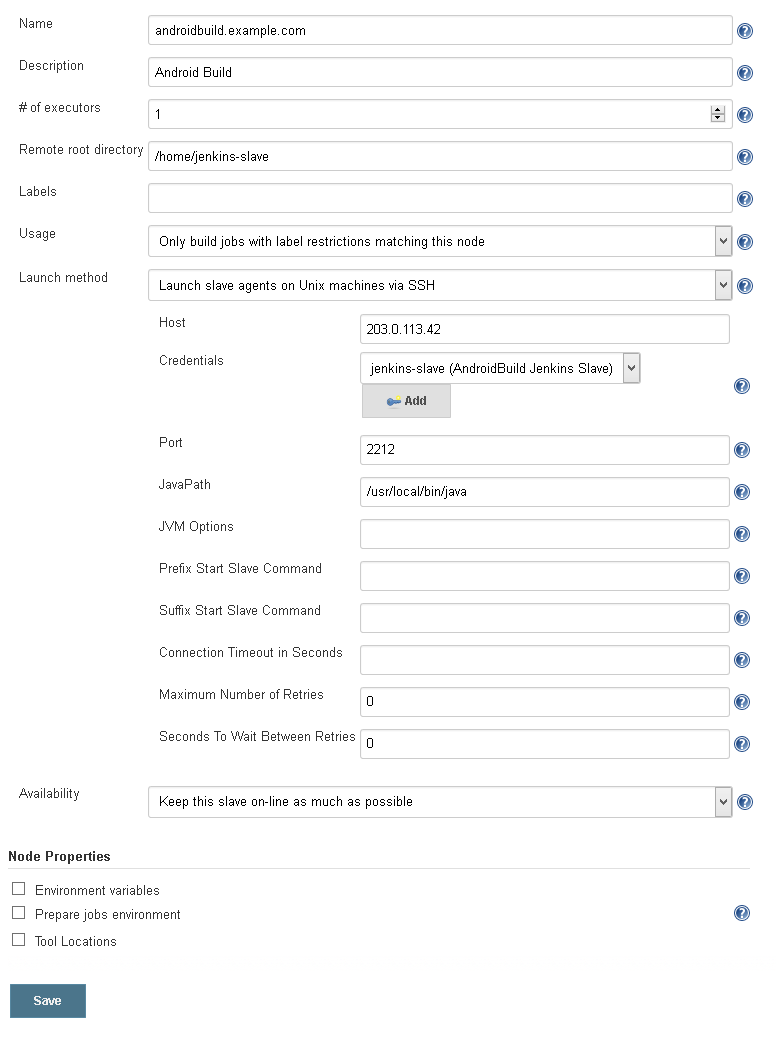
If everything goes well, the master node should connect to the server, install its JAR and start the slave node.

# ls
jenkins-slave-pepper-id_rsa     jenkins-slave-pepper-id_rsa.pub slave.jar                       workspace

# ps -U jenkins-slave
  PID TT  STAT     TIME COMMAND
66474  -  IJ    0:08.67 sshd: jenkins-slave@notty (sshd)
66478  -  IsJ  11:51.54 /usr/local/openjdk8/bin/java -jar slave.jar
Configuring the job
Create a new job, give it a nice name, and start the configuration.
The parameters
Click on "This build is parameterized", and add as many parameters as you want. You will be able to use these parameters as Jenkins variable everywhere later in the build.
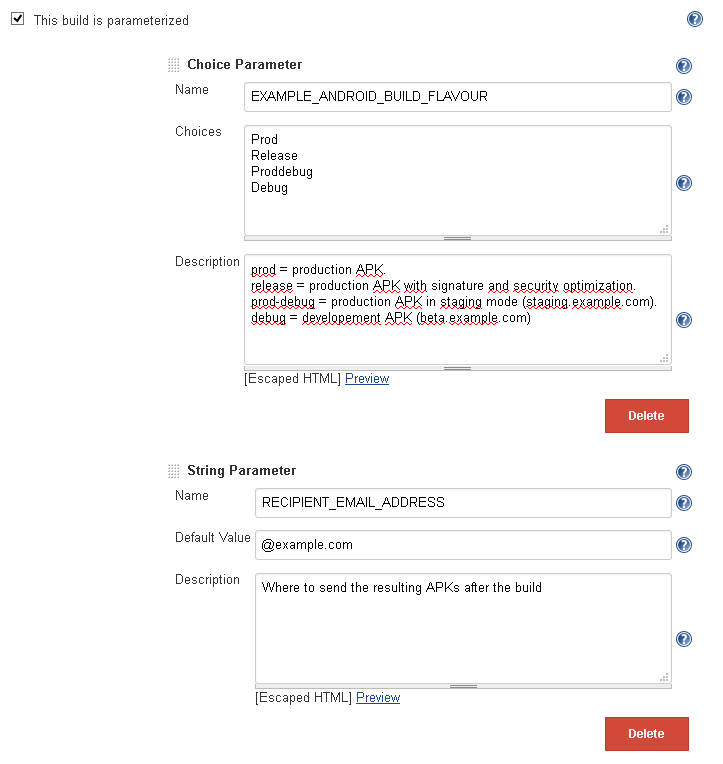
Here I have two parameters:
- One to specify what kind of build I want: debug, staging, production, etc.
- One that specify where I want to APK to be sent once it's built.
Fetching the code
Configure Jenkins to fetch the source code of the app where it's located.
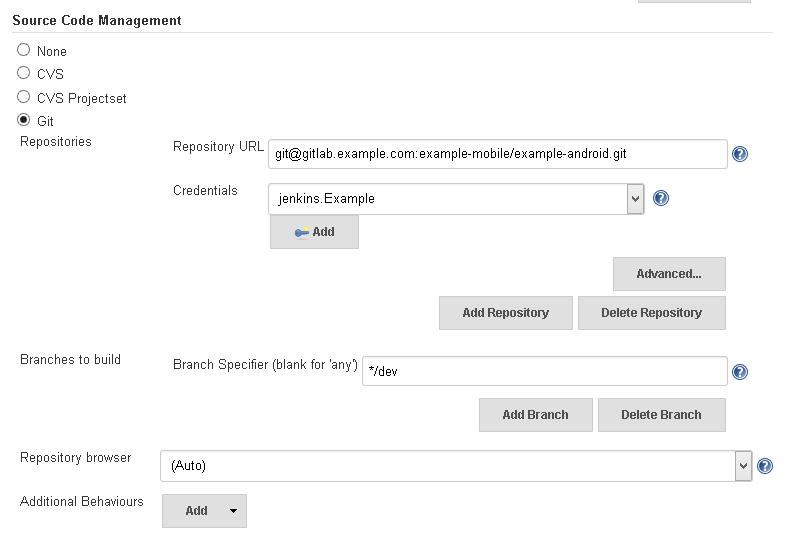
Here I'll fetch it from git.
Building the app
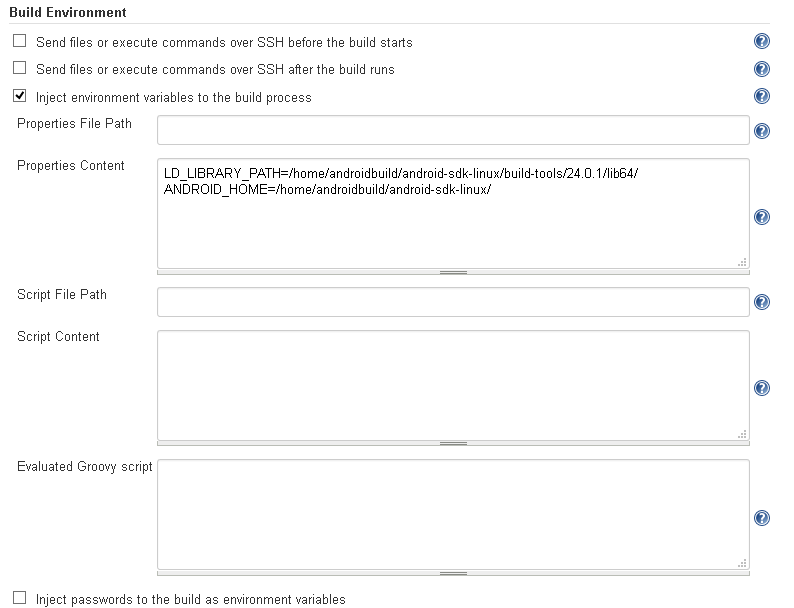
Add the required environment variables to the build.
Add a gradle build script, and invoke the tasks to build your app. Here you can use the parameters you set up at the beginning of the config.
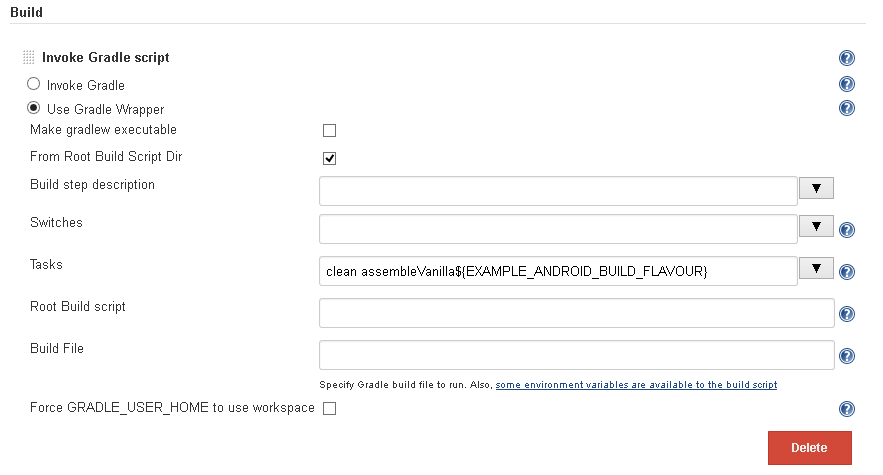
You can build without the gradle plugin if you want. It only displays the build nicer but is strictly non essential.
Email the APKs once they're built
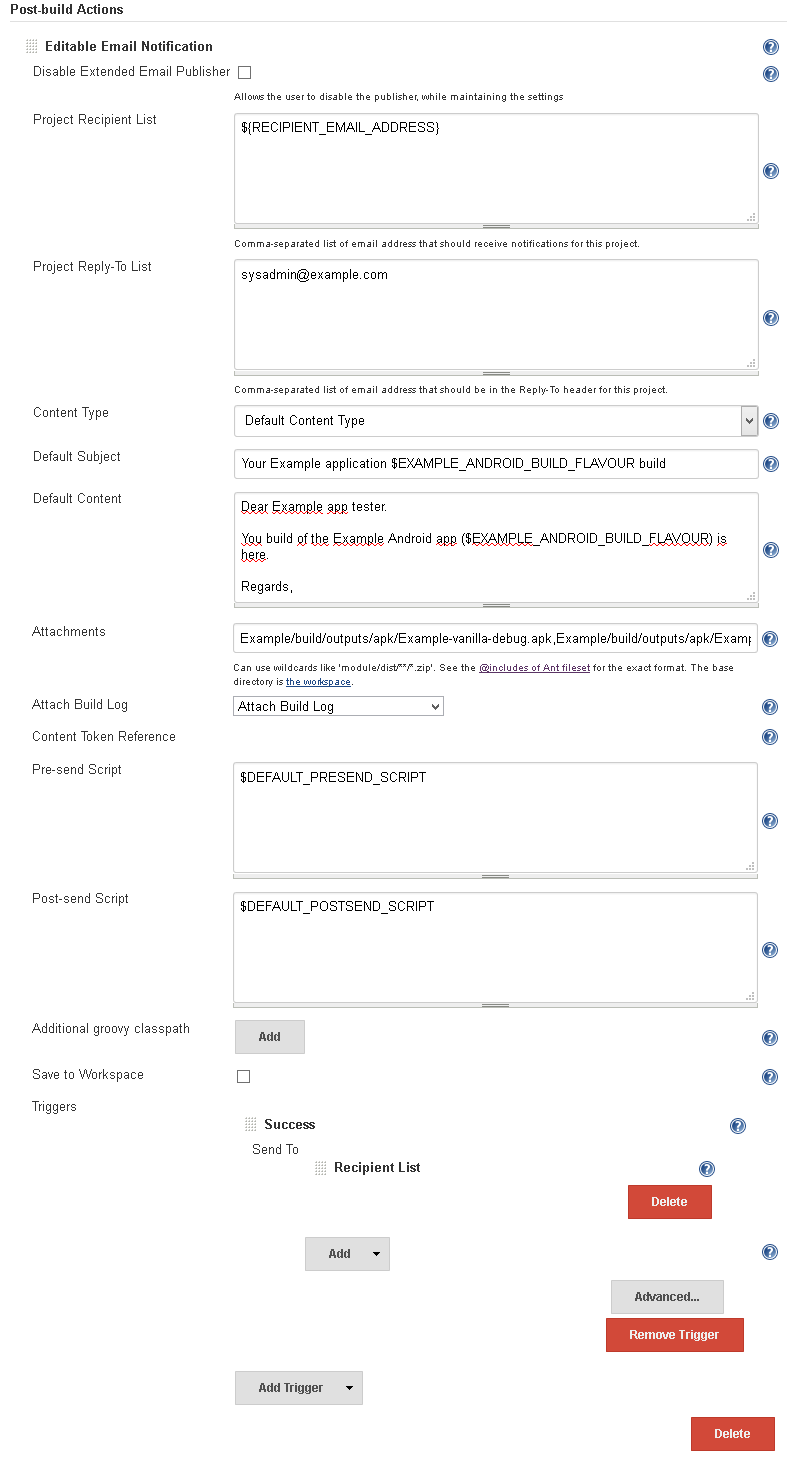
Add a post build step: "Editable Email Notification".
Put the recipient chosen by the user from the parameters into the list of recipients, customize the sender, reply-to, subject, content, etc.
Add the APK files as attachments.
Don't forget to configure the triggers to send the email if the build succeeds. By default, emails are only sent on failure.
Testing
Start a build. If everything goes well, you should receive the resulting APK by email a few seconds after the build is done.
